Note: Charging points with a serial number starting from BCU3XXXXX do not support WiFi.
All earlier models can be set up with WiFi using the steps below.
- Setting up WiFi step by step
You do this via the switch in the meter box. - Wait one minute
The charge point will now broadcast a temporary WiFi network: BCUxxxxxx (serial number).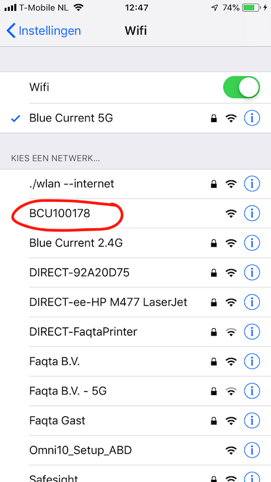
- Connect your phone or laptop to this network
You have 10 minutes to do this.
Note that some Apple devices sometimes do not show this network. In that case, use a different device. - Open a browser and go to ‘setup.now’.
You will now enter the settings menu of the charge point.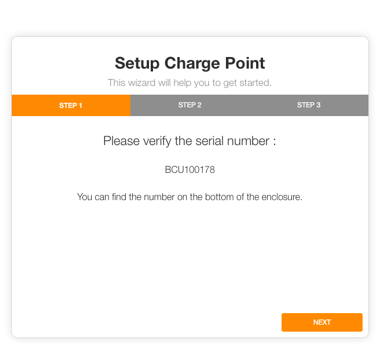
If you do not see this menu, then you are not connected to the Wi-Fi point in the charge point. - Click on ‘Next’ to go to Step 2
Only in exceptional cases do you need to change something here, such as:
- Phase connection: usually 1
- Max Current Setting: 6 Amps (safe minimum)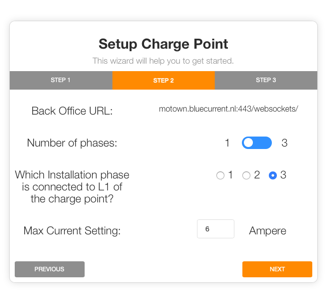
In a normal installation you don't need to change anything here. - Click on ‘Setup Wifi’ to Step 3.
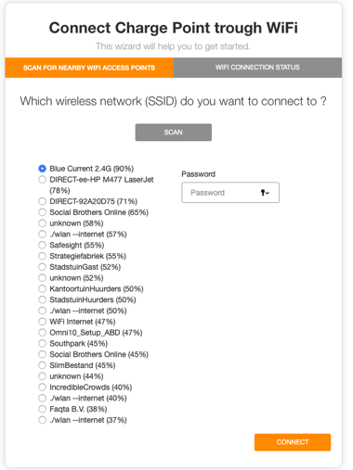
- Select the appropriate wifi network and enter the password